Instant Quote
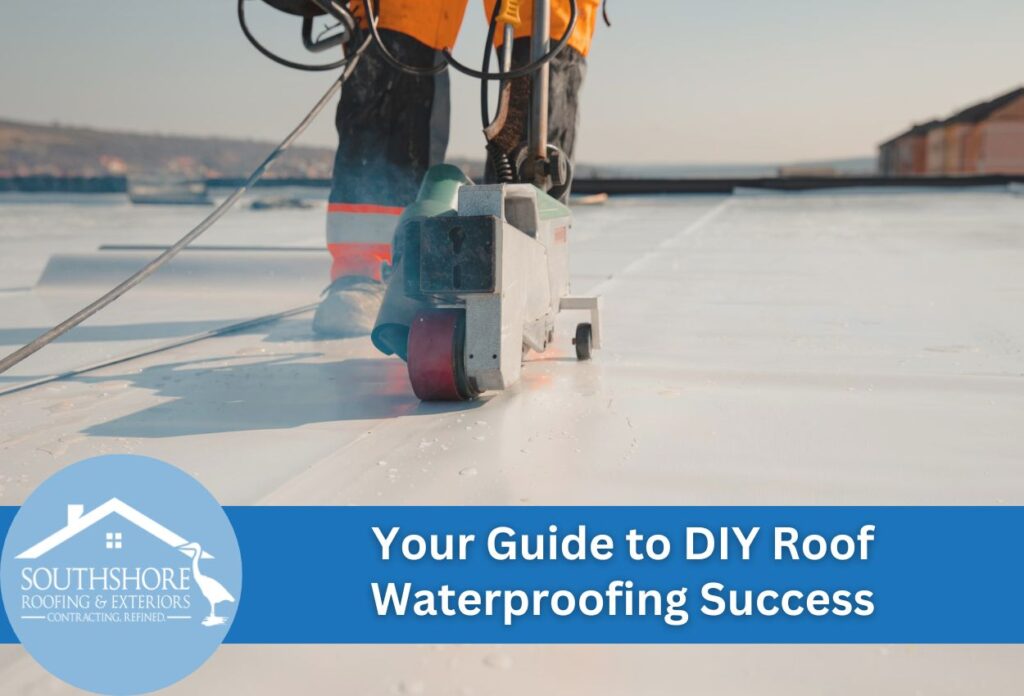
Roof waterproofing creates a protective barrier that prevents water from entering your home’s structure. Many homeowners wonder if they can tackle this project themselves rather than hiring professionals. The answer depends on several factors, like the type of roofing materials, the extent of the damage, and your skill level.
DIY roof waterproofing involves applying specialized materials and coatings to seal vulnerable areas where water typically enters. Common problem spots include around vents, chimneys, and damaged shingles. Modern roof waterproofing materials have made this task more accessible to homeowners willing to invest time and effort into proper preparation and application.
Simple waterproof roof coating applications work well for minor issues and preventive maintenance. These liquid-applied membranes create seamless protection across roof surfaces. However, extensive damage, structural problems, or complex roof designs typically require professional intervention.
Success with DIY roof waterproofing depends on choosing appropriate materials for your specific roof type and understanding proper application. Roof leak prevention starts with a thorough inspection and identifying all potential entry points. Learning how to seal a roof effectively requires patience and attention to detail, but many homeowners complete these projects when they understand their limitations and follow proven methods.
Essential Tools and Materials for Waterproofing Your Roof
Completing DIY roof waterproofing requires specific equipment and high-quality materials. Safety gear represents the most important component, including non-slip shoes, safety harnesses, hard hats, and protective eyewear. Application tools such as brushes, rollers, spray equipment, and squeegees ensure proper material distribution across roof surfaces.
Measuring devices like tape measures, chalk lines, and moisture meters help determine material quantities and identify problem areas before starting work. A reliable ladder or scaffolding system provides safe access to all roof sections during the waterproofing process.
Roof waterproofing materials vary significantly based on application needs and the material of your roofing system. Liquid coatings offer versatility and ease of application for many homeowners. These waterproof roof coating products fill in small cracks and create flexible membranes that expand and contract with temperature changes.
Membrane systems provide superior protection for flat or low-slope roofs. Self-adhering membranes work well around gaps like vents and chimneys. Rolled roofing systems require heat application or adhesives for proper installation.
Additional roof leak prevention materials include sealants, caulking compounds, and patching materials for damaged areas. Primer products enhance adhesion between existing roof surfaces and new waterproofing applications. Quality materials combined with proper tools enable homeowners to achieve professional-grade results when learning how to seal a roof effectively.
Safety First: Preparing for Your Rooftop Project
Working on rooftops presents serious risks that require careful planning and safety protocols. Before attempting DIY roof waterproofing, homeowners must understand essential safety measures to prevent accidents and injuries. Proper ladder positioning involves placing it at a 75-degree angle against the structure, extending 3 feet above the roof edge, and securing the base on level, stable ground.
Weather conditions significantly impact rooftop safety during waterproofing projects. Never work on wet, icy, or windy surfaces, as these conditions dramatically increase fall risks. Ideal conditions include dry weather with minimal wind and temperatures between 50 and 85 degrees Fahrenheit for the best material performance.
Personal protective equipment requirements include non-slip footwear with good traction, safety harnesses connected to secure anchor points, hard hats, and protective eyewear. Work gloves prevent cuts from sharp materials while maintaining grip on tools and roof waterproofing materials.
Assessing roof condition before starting prevents dangerous situations and project failures. Look for sagging areas, loose or damaged shingles, and rotted decking that cannot safely support additional weight. Check structural integrity around chimneys, vents, and other gaps where leaks typically occur.
Professional inspection becomes necessary when structural damage appears extensive or when homeowners feel uncertain about roof stability. Understanding these limitations helps determine whether a DIY approach is still possible or if the project requires professional roofing contractors for a safe project completion.
The Roof Waterproofing Process
Proper surface preparation is the first step to a successful DIY roof waterproofing project. Begin by thoroughly cleaning all surfaces using stiff brushes, pressure washers on gentle settings, or appropriate cleaning solutions to remove dirt, debris, and loose materials. Clean surfaces allow roof waterproofing materials to achieve maximum adhesion and create lasting protection against leaks.
Inspect the entire roofing surface for minor damage that requires repair before applying the waterproof roof coating. Fill small cracks with appropriate sealants, replace damaged shingles, and secure loose materials. You should also address popping nails, gaps around flashing, and deteriorated caulking around gaps. These repairs prevent water from bypassing the waterproofing system through existing vulnerabilities.
Apply waterproofing primer (not paint primer) to surfaces according to manufacturer specifications, particularly on aged or weathered materials. Primer enhances adhesion between existing surfaces and new waterproofing applications, extending the system’s lifespan and effectiveness. Allow the primer to cure completely before proceeding with coating applications.
Application techniques vary depending on the chosen roof waterproofing materials. Liquid coatings require even distribution using brushes, rollers, or spray equipment. Work in manageable sections, maintaining wet edges to prevent overlap marks. Apply coatings when the temperature isn’t too hot or too cold, and avoid application during high humidity or rain forecasts.
Follow manufacturer recommendations for coverage rates, drying times, and multiple coat requirements. Many waterproofing systems require two coats for optimal roof leak prevention. Understanding how to seal a roof properly includes respecting cure times between applications to achieve maximum protection and durability.
Choosing the Right Waterproof Coating for Your Roof Type
Different roofing materials require specific waterproofing approaches to achieve the best protection of the material. Asphalt shingles benefit from acrylic-based coatings that maintain flexibility while providing excellent adhesion to granulated surfaces. These coatings allow natural expansion and contraction without cracking or peeling, making them ideal for traditional residential applications.
Metal roofs need specialized waterproof roof coating formulations designed to bond with metallic surfaces and resist thermal movement. Elastomeric coatings work exceptionally well on metal roofing because they create flexible membranes that accommodate temperature-related expansion. These systems also provide energy-efficient benefits by reflecting solar heat away from the structure.
Flat or low-slope roofs typically require a more robust membrane system rather than simple liquid coatings. Modified bitumen, EPDM, or TPO membranes offer superior protection against ponding water common on these roof designs. These materials create watertight barriers that withstand continuous water exposure better than traditional coating systems.
Climate conditions significantly influence coating selection for DIY roof waterproofing projects. High-humidity environments require products with superior moisture resistance and mold prevention properties. UV-resistant materials become essential in areas with intense sun exposure to prevent premature degradation and maintain protective qualities.
Compatibility between existing roofing materials and new waterproofing products determines long-term success. Always verify manufacturer recommendations with substrate compatibility before purchasing roof waterproofing materials to ensure proper adhesion and prevent chemical reactions that could compromise the protective system.
Common Mistakes and How to Avoid Them
Many homeowners make critical errors during DIY roof waterproofing projects that can compromise the effectiveness of their roof and create more expensive problems. Understanding these mistakes helps ensure successful roof leak prevention and protects your investment.
Timing issues represent one of the most frequent problems with waterproof roof coating applications. Applying materials during inappropriate weather conditions leads to poor adhesion, premature failure, and wasted effort. Avoid working during high humidity, extreme temperatures, or when precipitation threatens within 24 hours. Many coating failures occur because homeowners rush application schedules rather than waiting for ideal conditions.
Inadequate surface preparation causes even high-quality materials to fail prematurely. Skipping cleaning steps, ignoring primer requirements, or failing to repair existing damage before coating application creates weak points where water can get in. Proper preparation takes time but remains essential for long-lasting results when learning how to seal a roof effectively.
Improper product mixing or storage frequently undermines DIY roof waterproofing success. Many materials require specific mixing ratios or temperatures for optimal performance. Storing opened products incorrectly or using expired materials significantly reduces effectiveness. Always follow manufacturer instructions precisely regarding preparation, application, and storage requirements.
Recognizing when projects exceed DIY capabilities prevents dangerous situations and expensive mistakes. Extensive structural damage, complex roof geometries, or safety concerns indicate that professional intervention becomes necessary. Multiple leak sources, significant damage, or repeated coating failures suggest underlying problems requiring experienced roofing contractors to address properly and safely.
Maintaining Your Waterproofed Roof for Long-Term Protection
Successful DIY roof waterproofing requires ongoing maintenance to preserve the protective barrier and maximize your return on investment. Regular inspection schedules help identify potential issues before they develop into expensive repairs or compromise the waterproof roof coating system. Establish a routine that includes seasonal checks, particularly after severe weather that may stress roofing materials.
Monthly visual inspections from ground level can reveal obvious problems like ponding water, visible cracks, or coating deterioration. Schedule more thorough examinations twice a year, checking for shingle lifting, sealant failures around gaps, and the condition of the coating. Document findings with photographs and notes to track changes over time and identify patterns requiring attention.
Basic maintenance tasks extend the waterproofing system’s life significantly without requiring professional intervention. Keep gutters clean and functioning properly to prevent water backup that can undermine roof waterproofing materials. Remove debris accumulation that retains moisture against protected surfaces. Address minor issues quickly, such as resealing small cracks or touching up worn coating areas before they expand into larger problems.
Recognize warning signs indicating when reapplication becomes necessary for continued roof leak prevention. Chalking, cracking, or peeling coatings signal approaching system failure. Recurring minor leaks or water stains suggest the protective barrier needs renewal. Understanding how to seal a roof includes knowing when maintenance transitions from simple touch-ups to complete system replacement. Maintaining detailed maintenance records helps track coating performance, plan future applications, and identify warranty coverage for materials or workmanship issues.
Expert Roof Waterproofing Services in Tampa with SouthShore Roofing & Exteriors
If your DIY waterproofing project feels overwhelming, or if you’re unsure about the right materials and techniques for your specific roof type, it might be time to call in the experts. At SouthShore Roofing & Exteriors, we specialize in professional roof waterproofing that guarantees long-term protection against the harsh Tampa weather. Our experienced team uses only the best materials and precise application methods to ensure your roof is thoroughly sealed and protected.
Don’t risk the structural integrity of your home with a DIY job that might not hold up. Contact SouthShore Roofing & Exteriors today at (813) 400-3329 for a professional consultation and see how we can help extend the life of your roof with expert waterproofing services.